
High Performance AMP Blog with Jekyll - Part 1
In this series I'll show how to setup a high performance, mobile friendly AMP Blog with custom Jekyll plugins while using GitHub pages as a free hosting provider. We create a staging environment and setup an automatic deploy and testing with Travis CI.
In Part 1 we create a Vanilla Jekyll Blog, serve it for local development and bring it online, all for free and within one hour.
The Basics - what are we talking about today?
GitHub Pages
First I stumbled over GitHub Pages a couple of years ago when creating an automatic documentation for a customer project. GitHub allows you to host a static generated website for free for your open source projects. We can use this to get rid of annual hosting costs without showing ads or suffering in speed, which is a pretty good deal. Static in this context means that there is no database involved and that you can’t do server-side magic, but you’ll see that this is not a big disadvatage as it may sounds in the first place.
Jekyll
Even though you could crank out static HTML websites by yourself or use any other Static Site Generators (as Hugo, Blosxom, Nanoc), I went with Jekyll since it officially supported by GitHub and I like to work with it. It’s very flexible and easy and the Liquid Template Language is backed by the great Shopify community. To install it for local development, just follow the installation steps.
Preparations
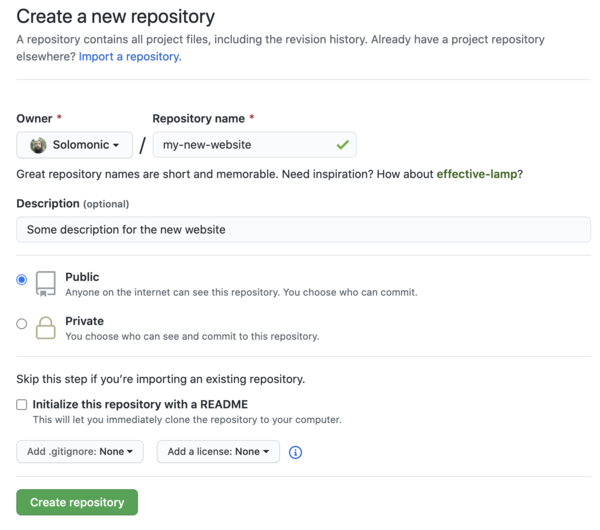
a) Register at GitHub if you don’t already have an account
Let’s create a new Jekyll website
a) Go to your development directory and install Jekyll and Bundler with RubyGems
~/development/websites
▶ sudo gem install jekyll bundler

Fetching jekyll-4.1.1.gem
Successfully installed jekyll-4.1.1
Parsing documentation for jekyll-4.1.1
Installing ri documentation for jekyll-4.1.1
Done installing documentation for jekyll after 1 seconds
Successfully installed bundler-2.1.4
Parsing documentation for bundler-2.1.4
Done installing documentation for bundler after 2 seconds
2 gems installed
b) create the new website with the help of the jekyll new command
▶ sudo jekyll new my-new-website
Running bundle install in /Users/ras.yen/development/websites/my-new-website...
  Bundler: Fetching gem metadata from https://rubygems.org/..........
  ...
  New jekyll site installed in ~/development/websites/my-new-website.
c) To avoid issues when building the very first time I had to run
development/websites/my-new-website
▶ mkdir _site && mkdir .jekyll-cache && jekyll build --future
...
Configuration file: ~/development/websites/my-new-website/_config.yml
Source: ~/development/websites/my-new-website
Destination: /~/development/websites/my-new-website/_site
Incremental build: disabled. Enable with --incremental
Generating...
Jekyll Feed: Generating feed for posts
done in 0.293 seconds.
Auto-regeneration: disabled. Use --watch to enable.
d) Now we are good to go to have a look at the newly created website. Use the bundler exec jekyll serve command to run it on your localhost
▶ bundler exec jekyll serve
...
Auto-regeneration: enabled for '~/development/websites/my-new-website'
Server address: http://127.0.0.1:4000/
Server running... press ctrl-c to stop.
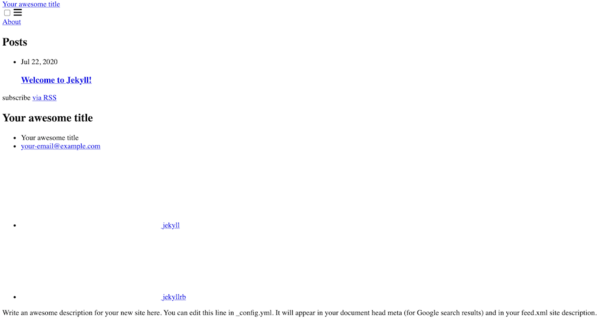
e) In your browser open up http://localhost:4000/
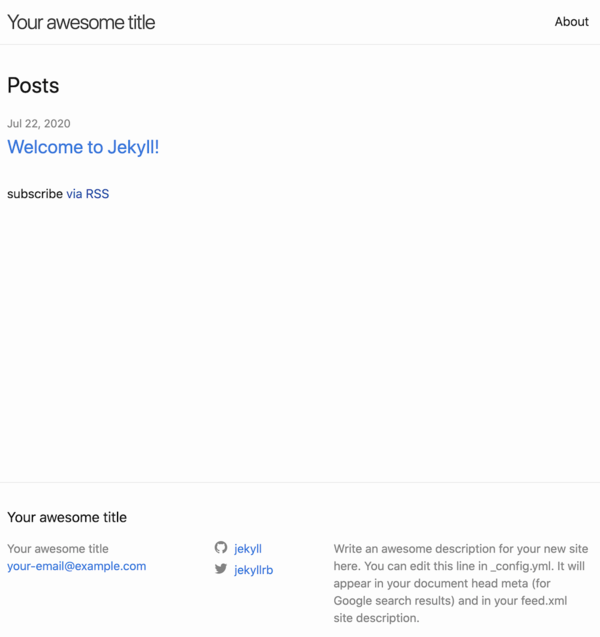
Congratulations
Let’s bring it online then
To serve the page to the world we need to add the project to our newly created repository. Luckily, that’s easy enough.
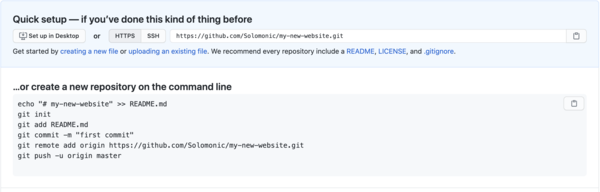
a) Open your empty repository at GitHub and copy its URL
b) Go to your local website folder and initiate the new repository
development/websites/my-new-website
▶ git init
Initialized empty Git repository in ~development/websites/my-new-website/.git/
c) add all the files and commit them
development/websites/my-new-website
▶ git add .
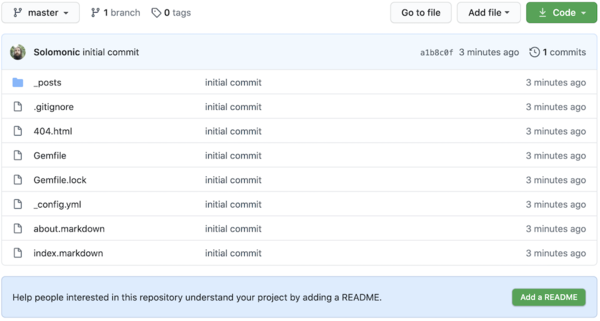
▶ git commit -m"initial commit"
[master (root-commit) a1b8c0f] initial commit
8 files changed, 248 insertions(+)
create mode 100644 .gitignore
create mode 100644 404.html
create mode 100644 Gemfile
create mode 100644 Gemfile.lock
create mode 100644 _config.yml
create mode 100644 _posts/2020-07-22-welcome-to-jekyll.markdown
create mode 100644 about.markdown
create mode 100644 index.markdown
d) add the origin and push it
▶ git remote add origin https://github.com/Solomonic/my-new-website.git
▶ git push -u origin master
Counting objects: 11, done.
Delta compression using up to 4 threads.
Compressing objects: 100% (11/11), done.
Writing objects: 100% (11/11), 4.28 KiB | 4.28 MiB/s, done.
Total 11 (delta 0), reused 0 (delta 0)
To https://github.com/Solomonic/my-new-website.git
 * [new branch]      master -> master
Branch 'master' set up to track remote branch 'master' from 'origin'.
Configure GitHub Pages
Now we need to tell GitHub that it should serve this. We go to the Settings tab of your repository, scroll down to the GitHub Pages section and set the Source to the master branch.
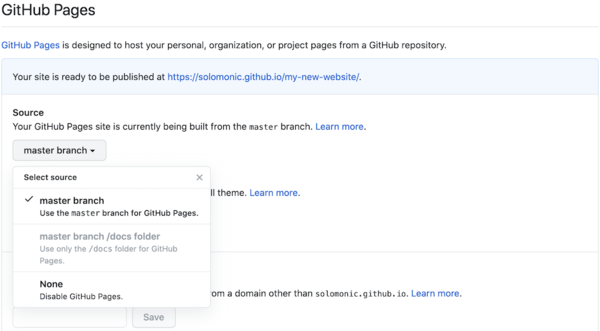
We now see an URL where we can see our blog online. It is available at https://YOUR_USERNAME.github.io/YOUR-REPO-NAME. We’ll setup a custom domain a little later, for now that will do.
When we click the provided link we get a rather disappointing result though, since the assets/main.css file is not found and links leading us to non-existing locations.
Fix the broken online GitHub page
If we inspect the page source we see that the css points to a reative URL /assets/main.css which resolves to the invalid location https://YOUR_USERNAME.github.io/assets/main.css (/YOUR-REPO-NAME is missing). It is working fine in local development, since the path is correct here with https://localhost:4000/assets/main.css but online is the website living in a sub-directory instead. We need have to update our _config.yml to set the paths correctly with the help of the properties url and baseurl.
# _config.yml
...
baseurl: "/YOUR-REPO-NAME" # the subpath of your site, e.g. /my-new-website
url: "https://YOUR_USERNAME.github.io"
...
We commit and push the changes and finally things look good as expected.
Adjust baseurl for local development
The setting of the baseurl has an unfortunate side-effect for local development though. When we run our jekyll serve command something odd is happening:
development/websites/my-new-website
▶ bundle exec jekyll serve
...
Server address: http://127.0.0.1:4000/my-new-website/
Server running... press ctrl-c to stop.
Our baseurl is mappend to the server address and if we navigate to http://localhost:4000/ we just see a messed up 404 Page not found. What we’ll need to do is to override the baseurl for local development and we can do that by serving jekyll with the help of the –baseurl parameter.
development/websites/my-new-website
▶ bundle exec jekyll serve --baseurl ""
...
Server address: http://127.0.0.1:4000/
Server running... press ctrl-c to stop.
Awesome, everything works now online and in local development.
Pro Tip: Create an Alias
If you are a little lazy in tipping like me you can add a permanent Alias for your terminal in your ~/bashrc or ~/bash_profile Open this file with your favorite editor
development/websites/my-new-website
▶ nano ~/.bash_profile
and add a shortcut command for convinience sake
 # .bash_profile
 ...
alias jekyll_local="bundle exec jekyll serve --baseurl ""
and activate it with
development/websites/my-new-website
▶ source ~/.bash_profile
Now you can serve your blog locally just by using our custom command
development/websites/my-new-website
▶ jekyll_local
...
Server address: http://127.0.0.1:4000/
Server running... press ctrl-c to stop.
Conclusion
We managed to created a new Jekyll Blog, can work on it locally and just push it to GitHub to get it online. In the following parts we’ll customize the theme so we actually serve an AMP page and connect the repo to Travis CI. We want to add a deployment pipeline to test that the online page doesn’t break and use custom gems which are prohibited by the standard build of GitHub Pages to make our site feature rich.
Stay tuned.