
High Performance AMP Blog with Jekyll - Part 3
In this series I'll show how to setup a high performance, mobile friendly AMP Blog with custom Jekyll plugins while using GitHub pages as a free hosting provider. We create a staging environment and setup an automatic deploy and testing with Travis CI.
On of the biggest drawbacks of hosting your Jekyll blog with Github Pages is that the standard build limits the plugins/ Gems you can use quite strongly. In this article we have a look how to setup Travis CI to actually build with custom Plugins/Gems and publish it to the hosted GitHub Pages. We overcome GitHub Pages limitation and get a feature rich site by skipping the standard build and let Travis CI do the heavy lifting for us.
The Basics - what are we talking about today?
Staging and production environments with Travis CI
Today we introduce the idea and implementation of two different environments for your Jekyll blog. We are going to have a staging branch in which we work and test things on our localhost, where we can install and explore custom plugins and as soon as we reach a state which should go online, we will push things to our production a.k.a. master branch with the help of Travis CI. This has many advantages compared with a single-branch-setup and let us do awesome things.
Configuring the repo
Currently is our new website served with the default configuration, in other words from the master branch with the automatic build of the _site folder. We are going to change that and use a custom build instead. The first thing we want to do is to create a new branch which we call staging. From now on we don’t work directly with the master branch anymore but do all the work in staging.
Creating the staging branch
development/websites/my-new-website
▶ git branch staging

development/websites/my-new-website
▶ git checkout staging
Switched to branch 'staging'

development/websites/my-new-website
▶ git push --set-upstream origin staging
Total 0 (delta 0), reused 0 (delta 0)
...
 * [new branch]      staging -> staging
Branch 'staging' set up to track remote branch 'staging' from 'origin'.
Make it the default branch
Next we visit our repository on GitHub and go to Settings>Branches. The very first section allows us to select the newly created staging branch as Default Branch

Changing the destination dir from _site to docs
The very next thing we want to do is to is to generate our website not in the _site folder but in docs For that we add the following to our _config.yml
# _config.yml
...
destination: docs
...
Since we want to generate the docs folder on-the-fly you may want to avoid to push it, one easy approach is to add it to your local .git/info/exclude.
# .git/info/exclude
docs
You don’t want to add it to your .gitignore file, since we’ll need it in the master branch to serve our website.
To check if everything works correctly, you can delete the local _site folder now and serve jekyll on your localhost with
development/websites/my-new-website
▶ bundle exec jekyll serve --baseurl ""
Configuration file: development/websites/my-new-website/_config.yml
            Source: development/websites/my-new-website
       Destination: development/websites/my-new-website/docs
...
 Server running... press ctrl-c to stop.
You see that the used destination folder now is docs and the blog looks exactly as before. To ensure you won’t push your local docs folder just check with git status
development/websites/my-new-website
▶ git status
On branch staging
Your branch is up to date with 'origin/staging'.

Changes not staged for commit:
  (use "git add <file>..." to update what will be committed)
  (use "git checkout -- <file>..." to discard changes in working directory)

	modified:   _config.yml

no changes added to commit (use "git add" and/or "git commit -a")
We are pushing the changes to staging and have a look at the results.
development/websites/my-new-website
▶ git add .
▶ git commit -m"changing destination folder" && git push
The website of course doesn’t change at all since it is build from the master branch, but our build on staging looks good.
Deployment to master
Now we want to get our changes from staging to be reflected on our website. We will setup a conditional deployment step that pushes changes to our master branch when we add a version tag of the form X.Y.Z (as in 1.0.0) to a commit. We don’t want this on every push, since we want to have the freedom to push things that are not suppossed to go live already.
In our .travis.yml we specify
...
deploy:
  provider: script
  script: bash script/deploy.sh
  skip_cleanup: true
  on:
    tags: true
    branch: staging

branches:
  only:
    - staging
    - /\d+\.\d+(\.\d+)?(-\S*)?$/
which tells the CI that the deployment step should be executed once it finds a tag on the branch staging. It is supposed to run our bash script located in script/deploy.sh and skip the cleanup step afterwards. Since we want to avoid that a deployment triggers more builds on the master branch, we tell Travis that it just should run builds on the staging branch with the specified format of our tag.
Deployment Script
Now we need to add the deployment script itself. We create the folder and script script/deploy.sh which adds and pushes the changes to our master branch
#!/usr/bin/env bash

git status
git add .
git commit -m"[skip travis] Automated build"
git remote set-url origin https://USERNAME:$PSW@github.com/USERNAME/my-new-website.git
git push origin HEAD:master --force
Authentification
Our main problem here is how we authenticate Travis CI to be able to do the push. GitHub allows authentification via https in the form of https://USERNAME:PASSWORD@github.com/PATH/TO/YOUR_REPO.git You may recognize the $PSW environment variable which holds the encrypted value of your actual PASSWORD, which can’t be readable for anyone who is looking into your build log.
To generate these you have to follow the steps in Travis CI Encrypted Variable Doc, which breaks down to two simple steps of installing the travis gem on your local computer and adding your named variable automatically to .travis.yml. For MacOS this is done by
development/websites/my-new-website
▶ brew install travis
...
▶ travis encrypt PSW=PASSWORD --add
This adds the encrypted value, which are only visible to the build itself and can be used by referencing $PSW or however you call the variable
Important note: You need to escape special bash charcters in your password. So if your password is 6&a(5!1Ab\ you need to type
development/websites/my-new-website
▶ travis encrypt PSW=6\\&a\\(5\\!1Ab\\\\"6\\&a\\(5\\!1Ab\\\\
Your .travis.yml should look now similar to
language: ruby
rvm:
- 2.6.3
dist: trusty
sudo: false
cache: bundler
notifications:
email: false
install:
- bundle install
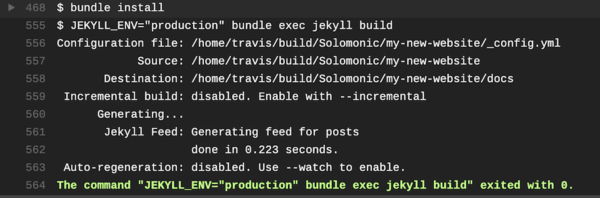
script:
- JEKYLL_ENV="production" bundle exec jekyll build
deploy:
provider: script
script: bash script/deploy.sh
skip_cleanup: true
on:
tags: true
branch: staging
branches:
only:
- staging
- "/\\d+\\.\\d+(\\.\\d+)?(-\\S*)?$/"
env:
global:
secure: fpXV7C9QagH87UQLu...
Run the deploy
Now we are all set and want to see if the deploy works.
First you push all your changes to your repository.
development/websites/my-new-website
▶ git add . && git commit -m"add deployment step" && git push
...
Now you need to fullfil the deployment condition that only tagged commit should be pushed to our master branch. You do that by adding a new tag and pushing it as well
development/websites/my-new-website
▶ git tag -a 0.1.0 -m"introducing automated deployment"
...
▶ git push --tags
Now let’s see how Travis CI does its magic
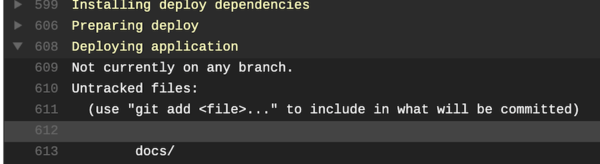
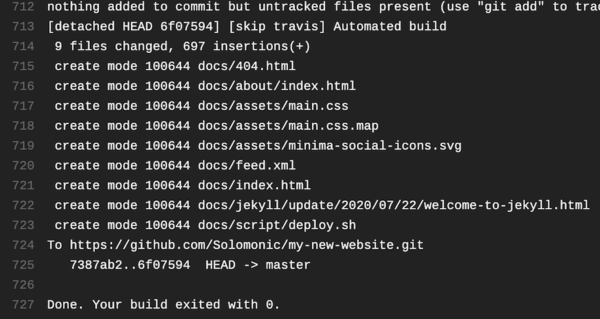
Brilliant, the deploy was successful. If we now go to our repos master branch, we should be able to see our generated docs folder
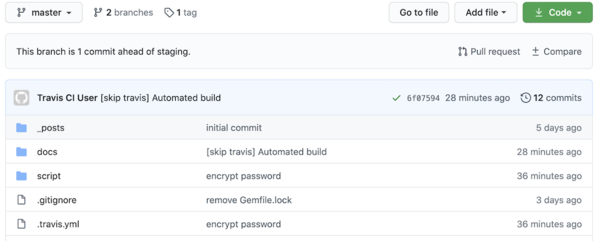
And there it is, we are build the static Jekyll website within the docs folder by running the deployment script on Travis CI
Serving the website
Currently we still see content from the GitHub Pages build in the _site folder online. Any changes won’t show up until we tell the GitHub Pages to serve now from the docs folder.
That is easy enough, just go to your repository Settings, scroll down to the GitHub Pages section and choose in the dropdown for Source the master branch /docs folder option.
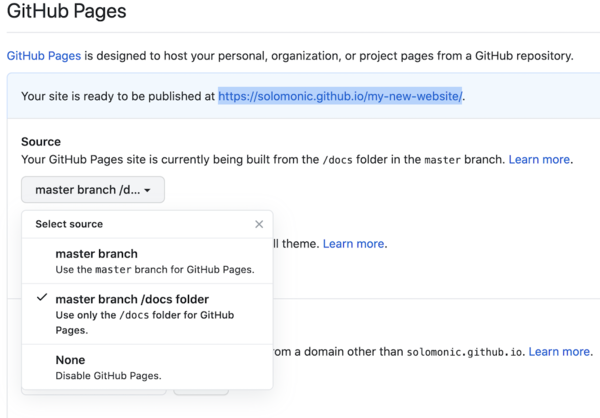
Now we can check our hosted website if everything still looks alright.
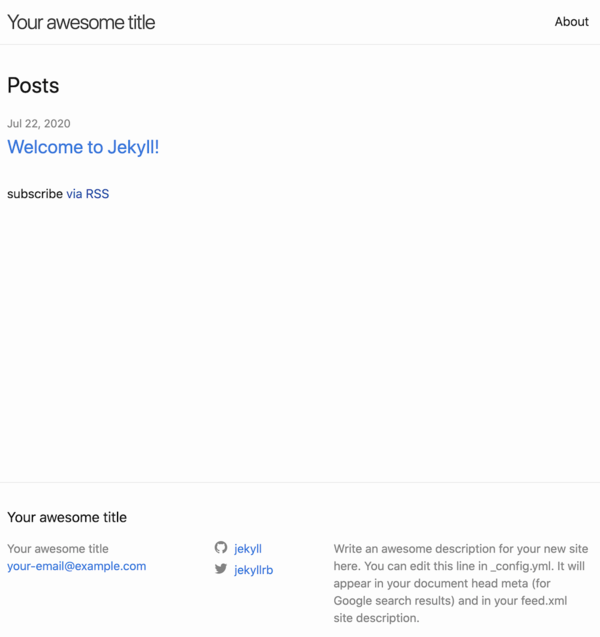
Since it still works as expected we are now going to use a custom plugin to demonstrate that we actually have done what we intended.
Using a custom Jekyll Plugin
We want to use the Jekyll Picture Tag plugin, which creates responsive images, rezizes them and solves the problem of switching resolutions. It also generates WebP versions of your image, so get our website a better score at Googles PageSpeed Insights by keeping Lighthouse happy. You just add a picture to your assets library as a image folder, it takes care of the rest and let you include images into your posts or templates by adding {% picture my_picture_name.jpg %} which renders to
<img src="/generated/my_picture_name-800-195f7d.jpg"
  srcset="
      /generated/my_picture_name-600-21bb6fGUW.webp   600w,
      /generated/my_picture_name-900-21bb6fGUW.webp   900w,
      /generated/my_picture_name-1200-21bb6fGUW.webp 1200w
    ">
Installing Plugin: jekyll_picture_tag
Have a look at the Installation Guide and you will see that it is installed like most other Gems by adding it to your Gemfile. Like in the given example I encourage you to add a jekyll_plugins group, but you won’t need to follow this practise of grouping your dependencies.
# Gemfile
...

group :jekyll_plugins do
  gem 'jekyll_picture_tag'
end
Now let Bundler install it
development/websites/my-new-website
▶ bundle install
...
Fetching jekyll_picture_tag 1.11.0
Installing jekyll_picture_tag 1.11.0
Using minima 2.5.1
Bundle complete! 7 Gemfile dependencies, 36 gems now installed.
Adding a picture
We add the picture flag.png to our root directory to test the behavior of the plugin. Of course can we configure a source and output folder but for now we are going with the out-of-the-box settings.
In our index.markdown we add {% picture flag.png %} and have a look:

The generated HTML source looks like
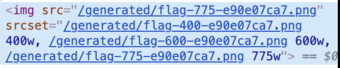
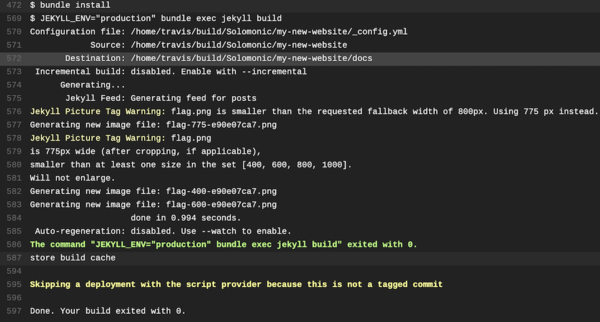
Our jekyll serve output shows that the new images are generated and that there is a potential problem with the image size of the used file.
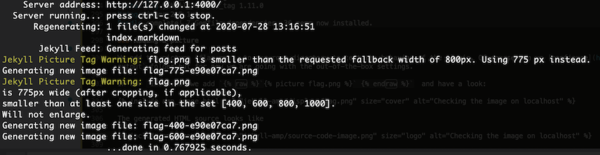
We will configure the plugin later in greater detail, if you want to know right now what is possible, please have a look at Jekyll Picture Tag Doc
Use the custom plugin online
Now we have to add and push our modified Gemfile, the new image flag.png and index.markdown and look at the build results
▶ git add . && git commit -m"add jekyll_picture_tag and use it on the frontpage" && git push
Now we wait until the Travis CI build is done and look at its results.
Ok, let us deploy then.
development/websites/my-new-website
▶ git tag -a 1.0.0 -m"install first custom Gem and serve with GitHub Pages"
...
▶ git push origin --tags
After the build and deploy is done, we can check our online GitHub Pages website:
Nice, it’s eaxtly the same as on localhost.
Conclusion
You’ve seen one way of creating and hosting a Jekyll website on GitHub Pages with a custom plugin that is not whitelisted. This opens up a lot of possibilities since you now can leverage the full power of existing Jekyll plugins and setup automated testing.